Hello everyone,
Recently there have been requests of how to set a Firo Masternode on some single board computers. This guide will go over how to install an OS on your raspberry pi → secure your raspberry pi for use as a masternode → and install Firo Core.
NOTE: This Guide will not go into use of tools such as nmap or Putty, there are many guides already available for these online
NOTE: FIRO CORE CAN NOT RUN ON A 32BIT SYSTEM
To get your 1000 $FIRO ready for masternode setup please consault the Firo Masternode Guide Firo masternode setup guide | Firo - Privacy-preserving cryptocurrency STEPS 1 - 3
The only extra steps you will NEED to do are:
Deleting ssh override (if it exists).
Creating a Static IP.
-----===== Raspberry Pi Image Setup =====------
To start you will need to download Raspberry Pi Imager (https://www.raspberrypi.com/software/) for your host computer.
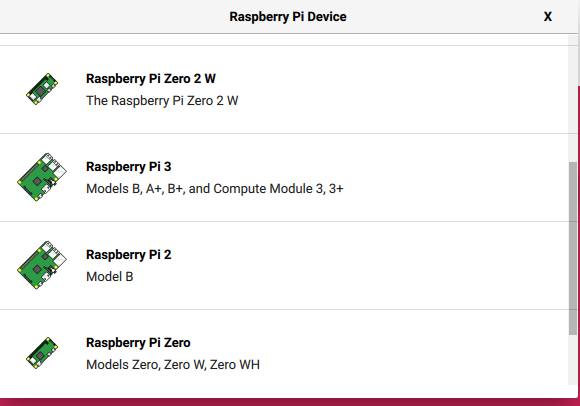
Select your device from the list provided (I will be using a Raspberry Pi Zero 2W for this guide with a micro SD U1 A1, this is not recommended for long term use.)
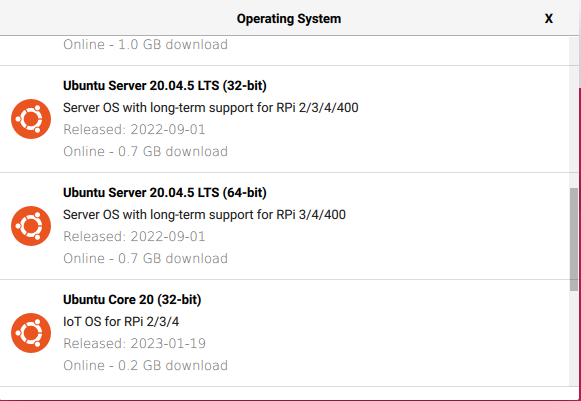
For this guide I am using the Ubuntu 20 Server image but you can use any 64 bit server image.
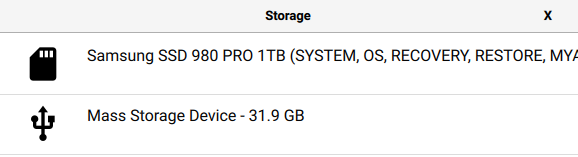
Select the storage device you wish to use for your raspberry pi.
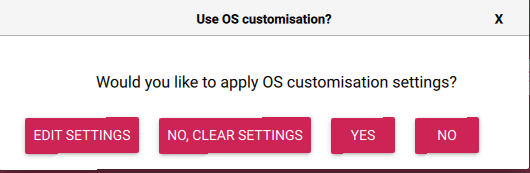
Select Edit Settings
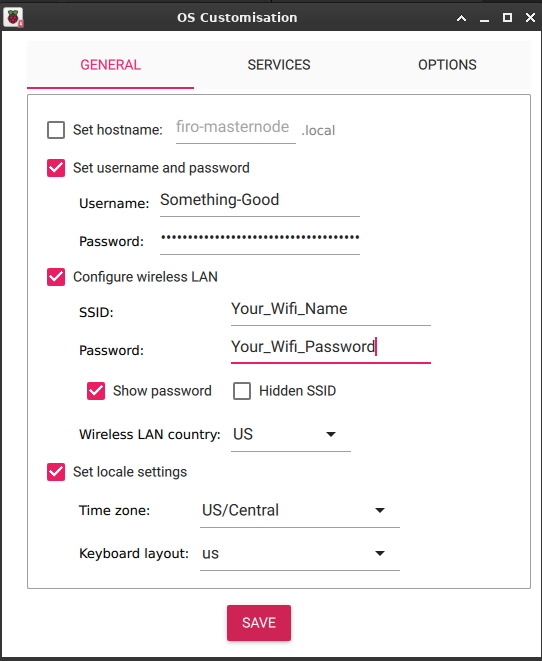
In Edit settings General tab Check
Set Hostname and enter the name for your server. Example: masternode_0Check
Set Username and Password – Use a good password, this account will have sudo privileges.If you will be using Wifi check
Configure Wireless LAN otherwise leave it unchecked.You need to select the correct wireless LAN country otherwise your wifi will not work. I live in the US, if you’re not sure your country code is it is usually the 2 letter abbreviation of your country.
Also check Set locale settings and set the timezone and keyboard layout.
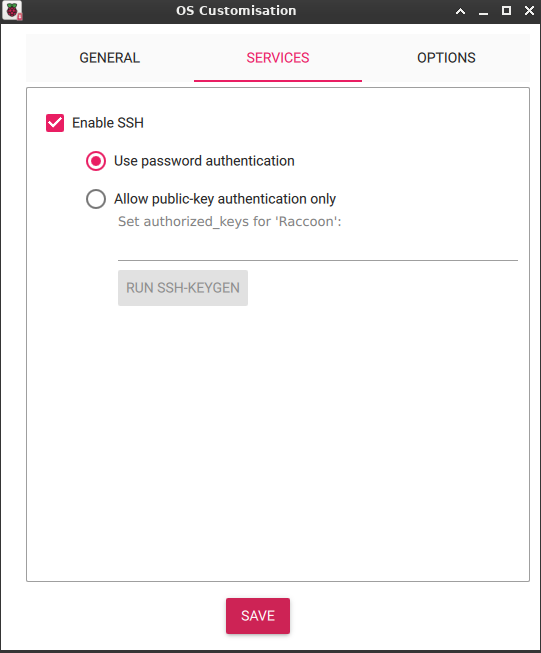
In the services tab check
Enable SSH, for now we will use password authentication. You can generate your ssh_key here. It will look something like:
ssh-rsa AAAAB3NzaC1yc2EAAAADAQABAAABgQDHQuw94qHX2/SvFwWmmGM/5CLAhiZo+rjDPu5agxu/m+Hqg1Fgvvu9boFg27ydl8Z8K0lrN9VVbFRuWWI6utpAzcugroqycbgelckE6i5uVa/XDn9KhvT7kYauD03jwZamRKg6ewb5Z6yqbUyA3y0BCCwcxCboJCKi8VWshStYVDdtYMt3bKpiCaukVh7Ufcho5OWQjeydwktYftAS4prCv0m9c6BsR28V+XVlBEkYf/UuUVtthjyQNw16k9OAZQ4EBwsClRHWwA5Fcz+FDJVOhDu93Jdwk49vLa0KmqFdfvcfvjmiEw0opmMKzBDqE6hXFxx+ZUX30ULlVIXBnFqPX1zDQHWStOtOuNWhnCcbGAKS8EoV8MDepG0sMgvu5YA1hs26cfcsZzFrcjHyLQNANyUYAmlDU+dlJcTptBrBil6VdpPFP61KO4qhNOCWgw6xGnYTYKVTtEjwBRUYwjj5Y7n7Tieuzslj+w4ab+HzKVnajuFGIlCa2UL0zrZP/es= user@host
NOTE:
a file will be created in your .ssh file named id_rsa and id_rsa.pub if this file already exists this same key will be used for every installation change the name of this file to something relating to your masternode such as firomn_0_rsa and firomn_0_rsa.pub my using the mv command.
Example mv {imager created key} {new key name} && mv {imager created key}.pub {new key name}.pub
Example: mv id_rsa firomn_0_rsa && mv id_rsa.pub firomn_0_rsa.pub
Select Save.
Select Yes.
It will as if you want to overwrite the storage device, double check you have selected the correct device and if so select yes. If not go back and select the correct device.
Your OS will prompt for a password because overwriting disks requires admin privileges, enter your password.
Your image will now download and install, its recommended to let the imager verify the process was a success.
-----===== Ubuntu Setup =====-----
Install your MicroSD, or plug in your SSD/HDD to a USB port and power source if needed. Plugin to a power source or PoE hat and turn on your Raspberry Pi (if your power supply doesn’t have a switch your Raspberry Pi will power on automatically).
Give it a few minutes after power on to set up.
To find the IP address of your raspberry pi either log into your router and find it on your DHCP server it will be should be labeled with the hostname you provided to the imager if you did not provide a hostname it should show up as ubuntu. Or you can use a tool such as Nmap to scan your local network, it will have port 22 and only port 22 open. The Raspberry Pi image will have unattended updates set up by default, this will take some time depending on your model.
After you have acquired the IP address use ssh or PuTTY to create a secure shell. You will be asked if you want to continue connecting, type yes. If you didn’t add a key during the raspberry pi set up it will prompt for a password. Enter the password you provided to the imager.
From here you can use the Firo Masternode Setup Guide Firo masternode setup guide | Firo - Privacy-preserving cryptocurrency, or continue with my guide.
The following steps will be preformed on your raspberry pi:
Update your Raspberry Pi
Check to see if unattended-updates are still running with the command ls -l /var/lib/apt/periodic/ if you get an output like:
total 0
-rw-r--r-- 1 root root 0 Feb 28 19:46 update-stamp
-rw-r--r-- 1 root root 0 Feb 28 19:52 update-success-stamp
your unattended-upgrades are still running, wait until they finish to continue.
Switch to your root user with sudo su - if your sudo password isn’t good someone could use it to gain root access.
Change your root password with passwd to something secure, root user can change anything they want on your server.
apt update && apt upgrade -y
NOTE: ALL of this guide from this point is preformed as root user
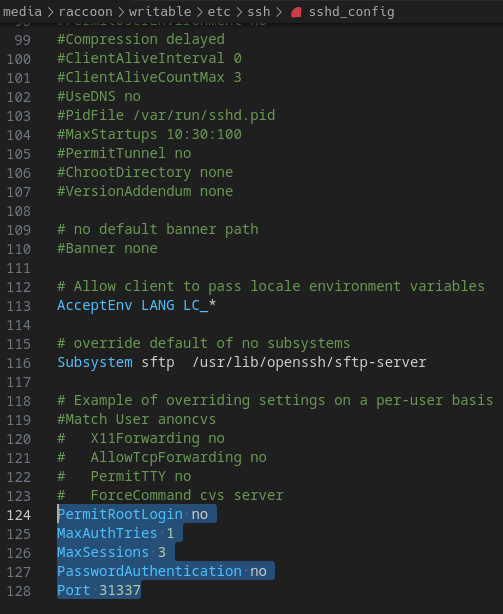
SSH CONFIG
Use these commands to append to your /etc/ssh/sshd_config:
echo "PermitRootLogin no >> /etc/ssh/sshd_config
echo "MaxAuthTries 1" >> /etc/ssh/sshd_config
echo "MaxSessions 3" >> /etc/ssh/sshd_config
echo "PasswordAuthentication no" >> /etc/ssh/sshd_config
This Step Can Be Skipped
To avoid every scrapper in the world from detecting that you have port 22-ssh open you can change your default ssh port, i prefer to chose a port over 10000, if you choose to do this please remember this doesn’t make your ssh service more secure necessarily, it just helps keep arbitrage it a bit.
echo "Port 31337" >> /etc/ssh/sshd_config
*this makes your default ssh port 31337 for your firewall and reconnecting over ssh.
Sometimes single-board computers have a ssh password override
rm /etc/ssh/sshd_config.d/50-cloud-init.conf
to ensure it doesn’t exist, and if it does delete it.
systemctl restart sshd.service
From here you should no longer be able to log into your server via ssh without using the key you had generated during start up. If you get disconnected and can not connect again with ssh plug your storage device back into you PC and open the writable folder. Then select etc folder, ssh folder and open the sshd_config file. Delete the added lines
This Step Can Be Skipped
Add Firo User
Personally I like to create a firo user to own my firo daemon. The reason is so the user running the firo service will have no admin privileges adding a bit of security. To do this run:
useradd firo
passwd firo
Set up a Static IP Address
This will prevent your Raspberry Pi from changing its IP address when its DHCP reservation has expired.
The following examples will set your IP address to 192.168.0.210, using your router at address 192.168.0.1. It will also set up your DNS to use CloudFlare Servers at 1.1.1.1 and 1.0.0.1.
You can change the IP address to whatever you want it to be, but make sure you are using the correct network and subnet. For example your router could be at address 192.168.1.1, in which case you would want to use an address in the 192.168.1.X range.
Your subnet is represented by the /24. This is common for most single routers by default. If you have a Mesh Type router your network subnet might be different.
Use the command ip a to help you figure out what your network is using.
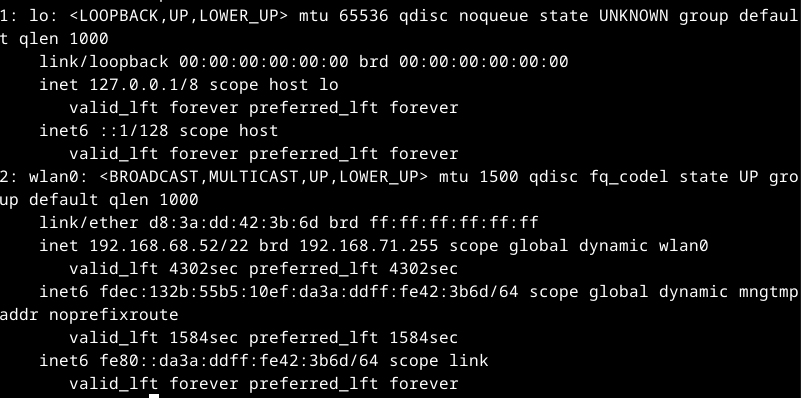
If you look you will see that my Raspberry Pi Zero 2W is using IP address 192.168.68.52 and its subnet is /22 due to my mesh router. Read your router documentation to find out more if needed.
Also not that my wifi interface is named wlan0, your Ethernet interface might be named something like eth0 be sure to change this to the correct interface in the following steps if needed, so your Raspberry Pi knows what to talk to.
This is for an example of a static IP address using Ethernet:
network:
    version: 2
    renderer: networkd
    ethernets:
        eth0:
            dhcp4: no
            dhcp6: no
            addresses:
                - 192.168.0.210/24
            nameservers:
                addresses: [1.1.1.1,1.0.0.1]
            routes:
                - to: default
                  via: 192.168.0.1
This is for a staticIP using Wifi
network:
  version: 2
  renderer: networkd
  wifis:
    wlan0:
      dhcp4: no
      dhcp6: no
      addresses: [192.168.0.210/24]
      nameservers:
        addresses: [1.1.1.1,1.0.0.1]
      access-points:
        "NAME-OF-YOUR-WIFI":
          password: "YOUR-WIFI-PASSWORD"
      routes:
        - to: default
          via: 192.168.0.1
Using nano /etc/netplan/50-cloud-init.yaml
Copy and paste your required configuration
netplan try
You will receive an error if you made a mistake.
If everything was a success using ip a again should show your new IP address.
cp /etc/netplan/50-cloud-init.yaml /etc/netplan/00-netcfg.yaml
rm /etc/netplan/50-cloud-inti.yaml
netplan try
If there are no errors move the the next step.
Configure Server Firewall
NOTE: If you plan on using your home internet and need to find your public IP address you can use curl ifconfig.me otherwise You should have the public IP address you will be using for the node available.
ufw default deny incoming
ufw default allow outgoing
ufw allow 22/tcp
ufw allow 8168/tcp
iptables -t nat -A OUTPUT -d {PUBLICIP} -s {LOCALSUBNET} -j DNAT --to-destination {LOCALIP}
iptables-save
Make a Swapfile
You need 4GB of memory to run firod efficently, if you dont have 4GB of RAM you can create a swap file (virtual memory) to compensate.
fallocate -l 4G /swapfile 4G will give you a 4GB swap if you want more or less virtual ram adjust this change the number before the G to the desired amount.
chmod 600 /swapfile
mkswap /swapfile
swapon /swapfile
printf "/swapfile\tnone\tswap\tsw\t0\t0" >> /etc/fstab
Firo-Core Setup
You can copy the aarch64 link from Release Firo v0.14.13.2 · firoorg/firo · GitHub and download it with wget pasting the link after. Once downloaded use the command tar xzvf firo*.tar.gz to extract the tarball
The user should be the user that will be running the firo service, it should NOT be root. From this point on I will be using firo as the username, change this as needed! Continue to work as root
chown firo:firo firo*/bin/*
mv firo*/bin/* /usr/local/bin
rm firo*
If you created the firo user in the previous step you can run this to preform all of the Firo-Core Setup steps in one line using this:
curl -s https://api.github.com/repos/firoorg/firo/releases/latest |grep download_url |grep aarch|cut -d : -f 2,3|tr -d \"|wget -i - && tar -xf firo*.tar.gz && mv firo*/bin/* /usr/local/bin && chown firo:firo /usr/local/bin/firo* && rm firo*
If you don’t plan on using a user named firo change firo:firo in the chown firo:firo /usr/local/bin/firo* to {YOURUSERNAME}:{YOURUSERNAME}
Write firo.conf file
Create a .firo folder with mkdir /home/firo/.firo
Create your config file with touch /home/firo/.firo/firo.conf
add the following lines, editing as needed.
NOTE: Make sure you have done steps 1 - 3 from Firo masternode setup guide | Firo - Privacy-preserving cryptocurrency
#----
rpcuser=ANYUSERNAME
rpcpassword=ANYPASSWORD
rpcallowip=127.0.0.1
#----
listen=1
server=1
daemon=1
logtimestamps=1
txindex=1
#----
znode=1
externalip=YOUR MASTERNODE IP:8168
znodeblsprivkey=YOUR SECRET OUTPUT FROM STEP 3 HERE
Then to make sure your firo user has access to all of the files created:
chown -R firo:firo /home/firo
Automatically Start Firod on Reset
copy and paste this into /etc/systemd/system/firod.service
nano /etc/systemd/system/firod.service
[Unit]
Description=Firo daemon
After=network.target

[Service]
Type=forking
Restart=always
RestartSec=30

User=username
Group=username
PIDFile=/home/firo/.firo/firod.pid

ExecStart=/usr/local/bin/firod
ExecStop=/usr/local/bin/firo-cli stop

[Install]
WantedBy=multi-user.target
Rotate Logs
nano /etc/logrotate.d/firo
Copy and paste
/home/firo/.firo/debug.log {
daily
missingok
rotate 28
compress
copytruncate
}
We have done a lot! Make sure everything works properly after a reboot reboot
SSH into your RPi Server again using ssh -i /path/to/masternode_rsa_key firo@{IPADDRESS}
This is everything you need to do to configure the Masternode
Please ensure your router is set up correctly and your masternode is synced to the tip before registering your masternode with STEP 7 of Firo masternode setup guide | Firo - Privacy-preserving cryptocurrency
Automated script coming soon
You can find me in the Firo Discord #support and #masternode channels if you need assistance